Please enable javascript, or click here to visit my ecommerce web site powered by Shopify. Cobbled Together by Brenna: toys -->

Pages

Showing posts with label toys. Show all posts

Monday, 24 March 2014

How to photograph your work using your phone & the Lightcase


Things have been busy here, my partner (tile designer extraordinaire Dominic Crinson) and I have been developing something for designer-makers that is going to make photographing small things super easy. It's called the Lightcase and we think it is brilliant! We've been working our precious prototype taking it to makers' studios and it's working a treat. It's basically a pop up photo studio, it's portable and low tech but creates a beautifully well lit space for photographing smaller things. It folds down into a nifty A4 folder and comes with three photographic backdrops - frosted, white and black...
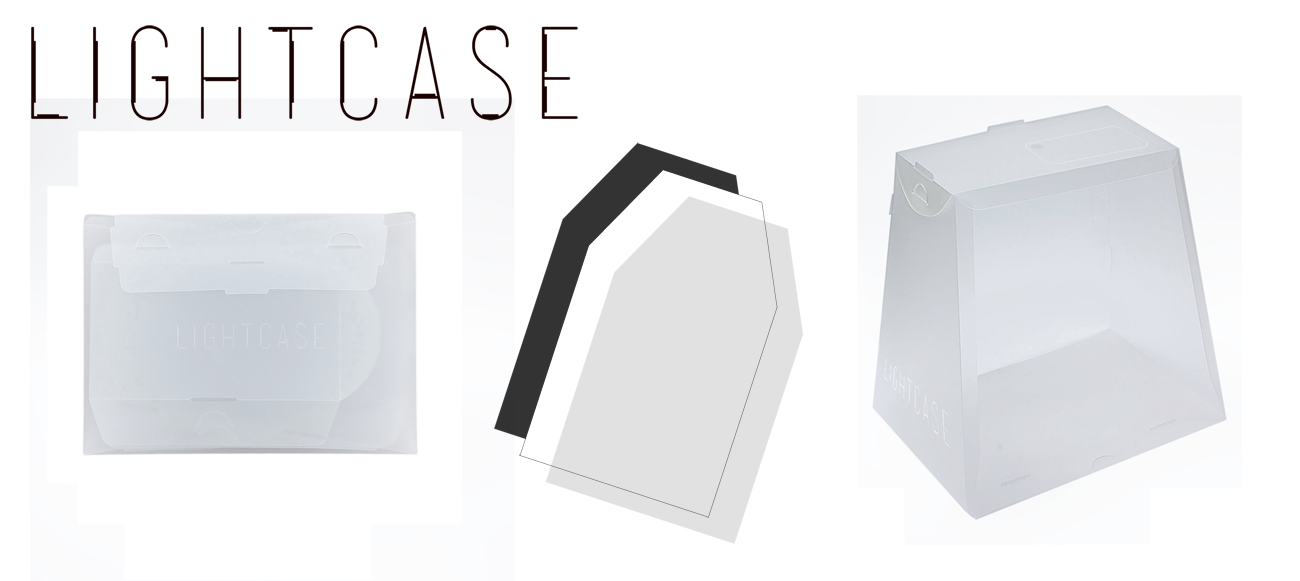


The Lightcase basically came out of a need we both had to take great photos of the things we make for selling and marketing online. We do have a really good Digital SLR but for photographing the little things, getting all that equipment out and setting up a makeshift white backdrop and good lighting all just seemed overkill. We wanted to find a simpler way and so the Lightcase was born! It's made from Polypropylene and it works so well and it's so durable. I just love the way it pops up into a mini photo studio so you can take it to where ever you have the best light available and quickly document your product from a few different angles and upload to Etsy, Folksy, Made-it or whatever e-marketplace you might be using to sell or promote your work.

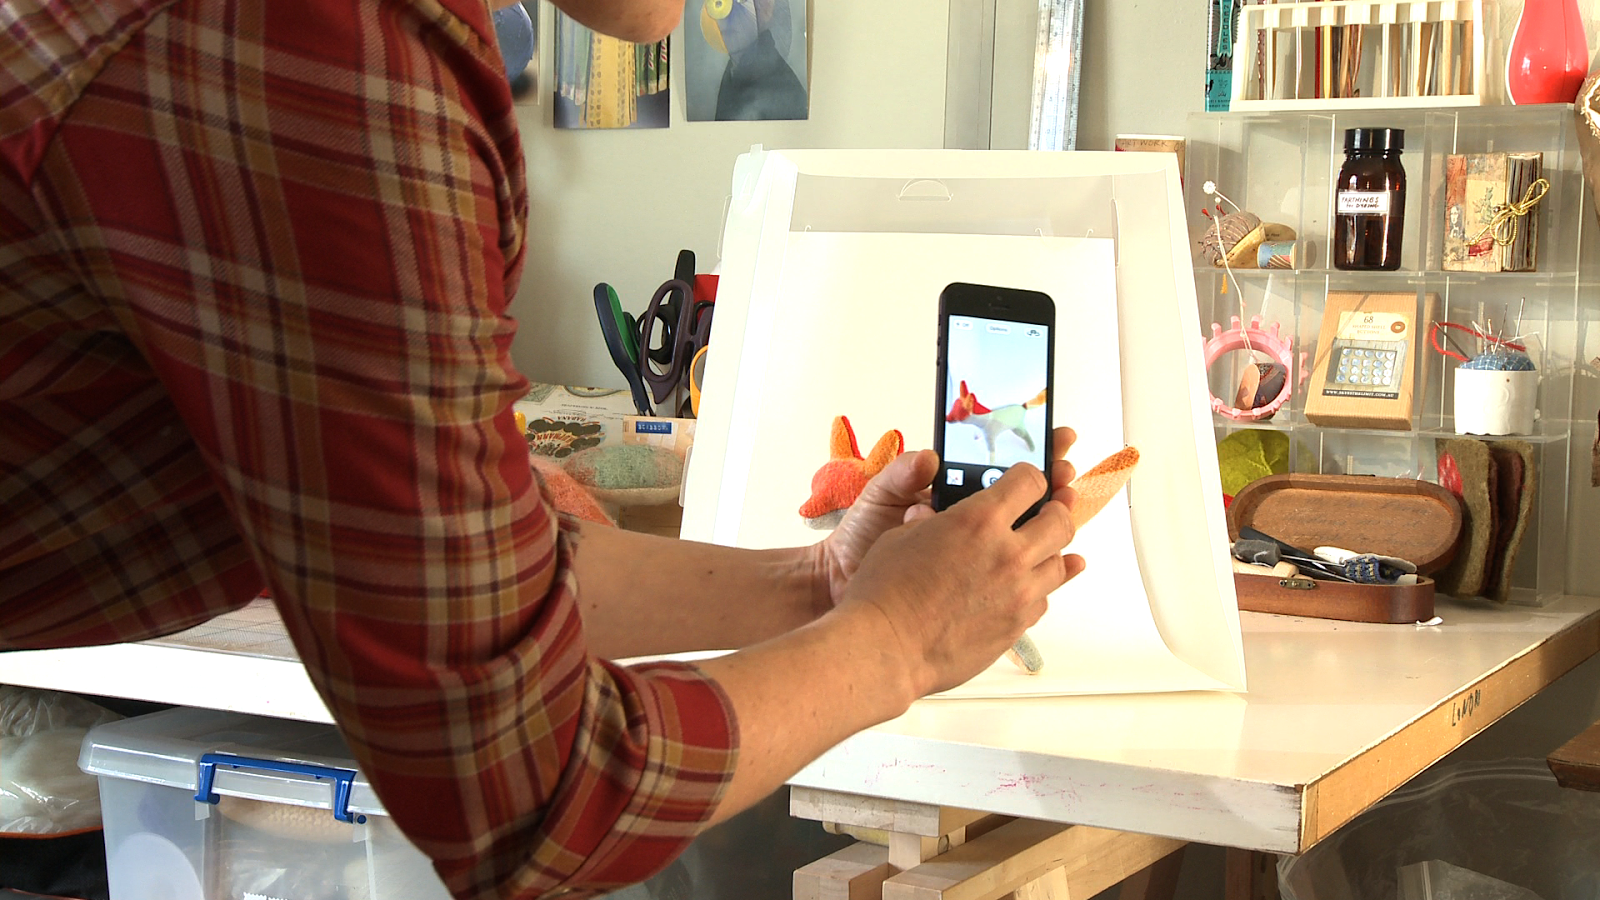
Here I'm photographing my products from the front with the white backdrop that comes with the Lightcase.


You can also photograph objects from above by placing your phone on top and aligning the lens with the hole in the top of the Lightcase. That way the Lightcase acts as a sort of tripod and you can get really sharp pics of smaller things from above. For taking pics from above you'd place the backdrop in flat as shown below...


What is great is that you don't even need a huge amount of light, the white material kind of captures the available light and traps it there and your phone camera does the rest! Smartphone cameras are pretty amazing these days and this suits me as I'd rather not get too technical, I just want to get good pics and get back to doing what I love best and that's making.

We really believe this is going to be a great tool for other crafters & designer-makers out there. We've even had a few other unexpected Lightcase enthusiasts like Warhammer miniature model makers and teachers who need to document student coursework. There are so many people who could use the Lightcase.

We're going to launch the concept on Kickstarter on the 1st April 2014 and if we can get it funded we can get the tooling done for the first production run of the Lightcase and get it out there for you all. It's going to be really affordable at about 22 pounds or around 35 US/AUS dollars... So stay tuned and if you like the idea go onto Lightcase on facebook and please do share it with anyone you know who could use one too. If you have any feedback at this stage, we'd love to hear your thoughts so leave a comment below.

Kickstarter Campaign Launch Monday 31st March 2014
https://www.kickstarter.com/projects/640799395/660666627?token=35353fb9

Like the Lightcase on Facebook to keep up with the campaign

Also www.lightcase.co.uk


Monday, 6 January 2014

Christmas orders

Happy New Year! Just a little eye candy for my first post for 2014, here are some of the guys I made up for Christmas orders, hopefully they made their way into the stockings of a few good children...


Monday, 2 December 2013

Foxy Samples

Just a quick post...working on some new patterns, here is my new fox design. This guy stands proud and he's on the run just like the foxes I've always spotted.

These are the first versions. I'm quite happy with him and his foxiness. Hopefully I'll be able to get some of these guys on Etsy soon although my haul of gorgeous wool blanket scraps is coming to an end...


I've also been making samples for a beautiful organic baby shop that I met with last week. These are two first versions of the polar bear and elephant using their gorgeous organic cotton and cashmere/wool blend fabrics... Filled with wool and embroidered with silk thread that I have dyed with rusty iron...


Wednesday, 6 November 2013

Woven blankets and blanket stitches

A friend collects old woven woollen blankets and makes hot water bottle covers from them. I was lucky enough to receive a bag of the scraps. I'm often too precious with bigger pieces of textiles that I collect and find it difficult to settle on a worthy project for them. So I love finding little scraps because you can be sure whatever you do with them it's going to be more worthwhile than sending them to the tip!


The blanket scraps were just big enough to make into a skulk of foxes. There is something very foxy about plaid, maybe it's the story book illustrations of foxes dressed in tweed. Anyway I think these guys look pretty dashing...


The blanket stitched edging around these blankets is just too special to discard and thankfully my friend had not been able to bring herself to throw them away.  Rolling the edging into little scrolls makes gorgeous coloured rounds that I have been stitching together into interesting brooches. 


Christmas is just around the corner now and I have my work cut out if I'm to complete all the projects I've started in time. For a maker Christmas always brings with it a sense of urgency and pressure as if the world stops buying handmade for another year. But like this little scroll below the world still goes around and around, as does the desire to continue to make and mend.


Monday, 21 October 2013

Reclaiming the Nights

Gosh, this year has flown by. It's terrible, I haven't posted since my February wet felted chair fiasco for a number of reasons. One being that said chair is like a thorn in my side, sitting there unfinished, slowly un-felting itself and unravelling into a ball of fluff. This was an experiment that needed a little more time than I currently have what with a wild one year old in tow.


Said one-year-old is the other reason I haven't posted in a while. Above is a portrait of him by the 4 year old and that is the child himself. You can kind of see what I mean can't you.


So I have reclaimed the nights for creative expression and moved my studio into the living room where I currently work by night after baby is asleep. I'm loving my view from the window which I rarely get to enjoy since it's usually dark out by the time I get to my desk.


This is a little Christmas needle felted Angel that I've started working on. She hangs by the window and I love how the sunlight glows through the wool and mohair and catches in the gold beaded halo.

Because Christmas is approaching I've been working on more woolly polar bears. I've started tailoring clothes for the bears too.


This guy is listed on Etsy already and there will be more joining him soon

Now this is a curious device that I can't wait to try out. I found it on the shelves of a charity shop in one of my favourite English towns Hebden Bridge, North Yorkshire. It has the original post label on the box which reads "Scotia Wools Ltd, 158 New Bridge Street, Newcastle-on-Tyne, 1. Mrs Gardner, 32 Hodgkin Park Road, Newcastle upon Tyne. Date 10/11/1948. " It has a 9 pence stamp on the box.
I'll take more photos of the thing itself soon. I'm looking forward to trying it out. Who knows maybe I'll start making rugs next. Has anyone ever come across one of these? 

Wednesday, 13 April 2011

How to make knitted Easter bunnies

This is a great craft project to do with the kids this Easter holidays. I've seen this in an old Waldorf crafts book, it's really simple and great project for Spring. It involves no knitted shaping, you just start from a square of fabric and the rabbit shape is formed by the simple sewing up and stuffing.

Step 1: knit a square in garter stitch or stockinette stitch or for a super fast rabbit cut out a square from an old woollen sweater. A square about 18cm (7") width makes a large bunny as shown, the little one is made from a square approximately 12cm (5").

Step 2: Sew each corner up about one third of the length of the edge...

Step 3: Stuff the cavity with wool, putting a bit more stuffing in the top as this will form the head.

Step 4: Sew up the hole by gathering the top and bottom of the hole and stitching the sides of the hole together...
Step 5: Form the head by tying a length of yarn around tightly at the end you would like the head to be.

Step 6: Sew the limbs in place by sewing the front two legs together and folding the back two legs forward and stitching them to the body to keep them in place.

Step 7: Make some ears, stitch some eyes and a nose and finally attach a small pom pom or ball of yarn to form a tail. The ears can be made from cutting out a piece of felt, knitting some up or using a folded i-cord or other piece of cord or ribbon. Improvise and make your bunny uniquely yours. Happy making!

Other craft activities to do with the kids this easter holidays:

Monday, 14 March 2011

Doll making - Day 2


Doll making day of reckoning. Assembly time. This was the hard bit, I had been stressing about getting the face right. I have learnt making my owl dolls and other dolls in the past that a few embroidery stitches can either make or break your doll and I wanted to get his expression just right... Anyway to cut a long story short, I did it! I am super pleased with him and Merlin has already given him a tea party and lots of cuddles. He's also remarked that he has "nice hair" (see post below). This is truly a man after my own heart, I knew he appreciated luxurious fibres. All he needs now are some hand knit clothes. Oh joy!


To see pics of the doll in the making see previous post

Wednesday, 15 December 2010

Additions to the Owl Scout Family

My owls were very popular at the Christmas fairs and I'm pleased that there will be lots of fluffy woollen owls under Christmas trees this year. Here are a few more made out of a refashioned icelandic woolen sweater. Alas the green baby owls have already gone but the others are soon available on Etsy and Folksy...

Friday, 3 December 2010

More papoose babies

Just packed up all my babies ready for this weekend's Advent Craft Fair. Here are some more Papoose babies,  I just love them all huddled together like this.


Tuesday, 23 November 2010

Papoose Baby Dolls


I'm making a series of Papoose baby dolls. I was inspired by a film I saw recently called Babies (2010). It's basically a documentary following the births and babyhood of four children, one born in San Francisco, one in Tokyo, another in Namibia and the last in Mongolia. It's really fascinating. It very much illustrates to me how much we, in the west, are having fewer and fewer "real" daily experiences. There is a scene which cuts between a baby in San Francisco, playing indoors with plastic toys and a baby in Namibia exploring the banks of a creek with his sibling which I found particularly moving.

For a baby, those "real" experiences of the world are so important for development. By "real" experience I mean sensory experiences of the natural world. That's why I believe that the baby should be clothed in  natural fibres and surrounded by things made from natural materials as much as possible. Maria Montessori wrote in her book 'The Absorbant Mind', "The child has a different relation to his environment from ours. Adults admire their environment, they can remember it and think about it; but the child absorbs it. The things he sees are not just remembered; they form part of his soul. He incarnates in himself all the world about him that his eyes see and his ears hear...the child is transformed by them."

But I digress! Back to the dolls...In the film when the Mongolian baby is born, he is swaddled tightly in a blanket that is tied up with a number of ribbons.


The next scene shows her swinging her leg over a motorbike and riding back to the yurt on what must have been the bumpiest of terrains, ouch! It was quite impressive yet also slightly unnerving. 


The image of the swaddled baby has stayed with me.  I have collected a few colourful, ethnic woollen garments that I have boiled up and felted and turned into these little Papoose Baby Dolls. I think they are quite adorable. I'm selling them at the St Paul's Advent Fair and on Etsy/Folksy if anyone is interested. 


More pictures of the other dolls coming soon....

Related Posts Plugin for WordPress, Blogger...