My little one needed a little bendy figure that could drive his cars, ride horses and the like and while I had a creative friend staying last week we made some cute little dolls. They started out as simple wire framed things but soon, as often happens with us, became quite involved little guys, felted, painted and clothed. Here are some photos.
First we used white Milliput to make heads, hands and feet with flat soles, these we left to dry whilst we went to Hackney City Farm for some play. Then we made little wire frame stick men out of pipe cleaners and wrapped them with strips of carded wool from the seaweed eating sheep in North Ronaldsay, that I collected in Orkney (that I still haven't done anything with!). Then we felted them by rubbing them with washing liquid and hot water until the body was firm and made little outfits out of scraps of linen fabric. I had a tiny scrap of beautiful Japanese silk left that I used to make a hat which really made him characterful. A nice little project to use up the ends of other projects.
I'm so loving "World Textiles" the latest issue of Hand/Eye magazine. It just makes me want to up sticks and go on my own around the world textiles journey...
Monday, 25 July 2011
Saturday, 9 July 2011
Broadway Market Saturdays from 9th July onwards and upwards
We had a really good first day selling our handmade children's clothes and gifts at Hackney's Broadway Market yesterday. So we'll be there every saturday for the foreseeable future and it's inspiring to talk to customers and get feedback. Here's our stall. The dolls are made by the lovely girls at Dalston Dolls, who I did the Steiner doll making workshop with.
Labels:
craft fairs,
london,
market stall
Monthly carboot loot
I'm really pleased with this months carboot haul. Every month we go to the Chiswick carboot sale and I hunt down fabric off-cuts, tablecloths, linen and anything I can repurpose into my wares. I already blogged about my super special hemp grain sack, here are the other bits and pieces. Some have already become little toddler pantaloons and smocked hats.
I love the label on this piece of gingham from Chung Nam Weaving Factory in Hong Kong. I wonder how old it is? It's already half stitched into one of my smocked summer hats.
Friday, 8 July 2011
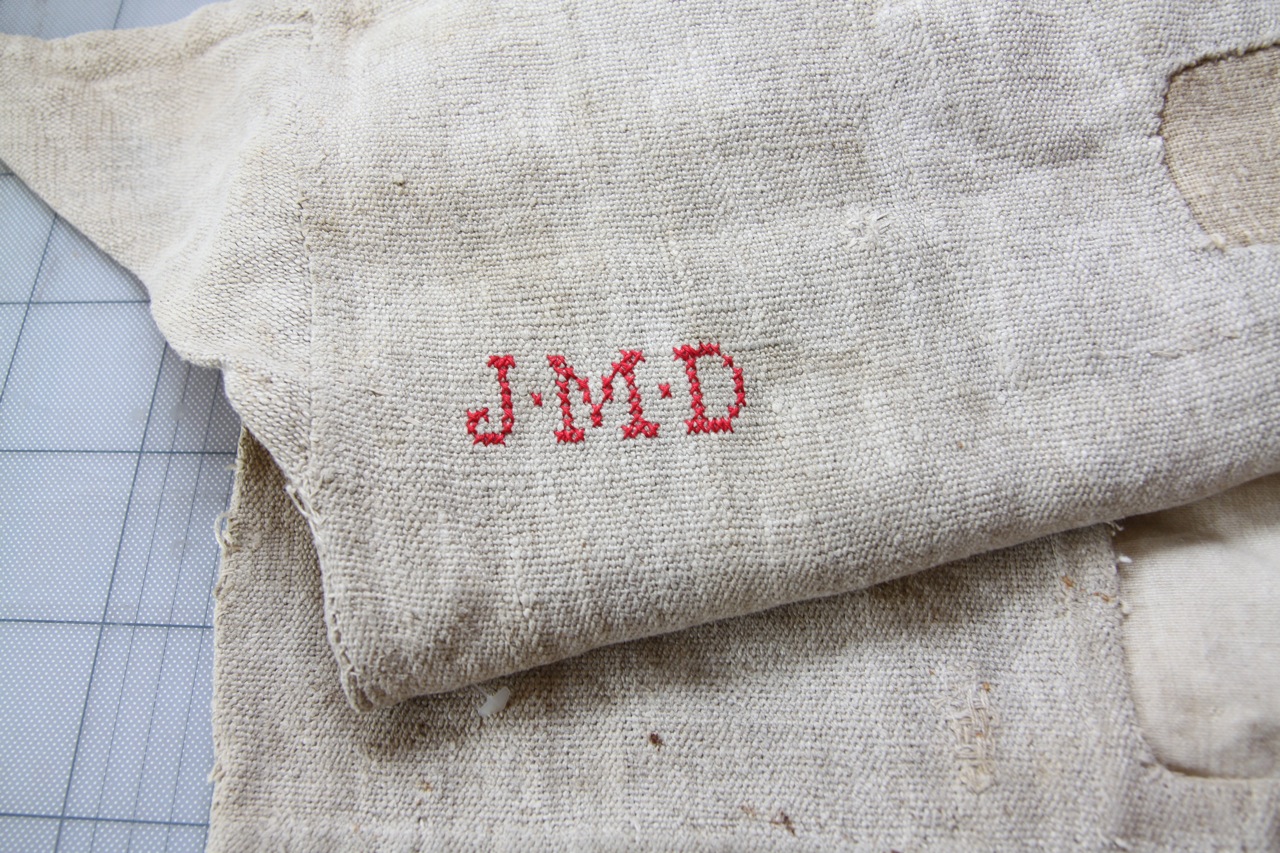
Darned hemp grain sack
Last weekend was our monthly carboot hunt in Chiswick, and I found this beautiful antique hemp grain sack for a steal. It's French and has been darned and mended so many times that it is starting to resemble a patchwork or the the Japanese boro textiles that I drool over at Sri Threads. It's pieces like these that you just want to frame, it is so exquisite.
By the way, I have been loving listening to these incredible postcasts by Maiwa called Voices on Cloth. I'm day dreaming whilst sewing up a storm for my market stall in the school yard at Broadway Market tomorrow.
Tuesday, 28 June 2011
We Make London Pop Up Shop
I'll be selling my wares at the We Make London Pop Up Shop in Hampstead from 2-9 July. It opens this Saturday. See my designer feature on the We Make London Blog.
Here is a sneak preview of some of my handmade goodies.
Lots of lovely things for babies and toddlers mostly...
These are my popular baby & toddler pantaloons, based on a harem pant with a wide waistband and leg cuffs, this pair is made from some natural linen I found in a Norman brocante which was originally a curtain in a Paris hospital stamped 1843. It's beautifully soft with a heavy drape. I just love this fabric. Some of it was beautifully darned too, I'm adding this bit to my darning collection!
A variation on my pantaloons, these playsuits are adorable. They are so perfect for babies and toddlers because they do not restrict the movement and flexibility like many toddler trousers do so they can sit in that perfect lotus pose that only a child can do!
Also for little ones my patchwork neckerchiefs are made from my scraps of vintage fabrics that I just can't throw away. They are a stylish way of catching the dribbles of a teething baby and reversible too.
There will be much more at the show, please come along!
Wednesday, 22 June 2011
Weekly sourdough
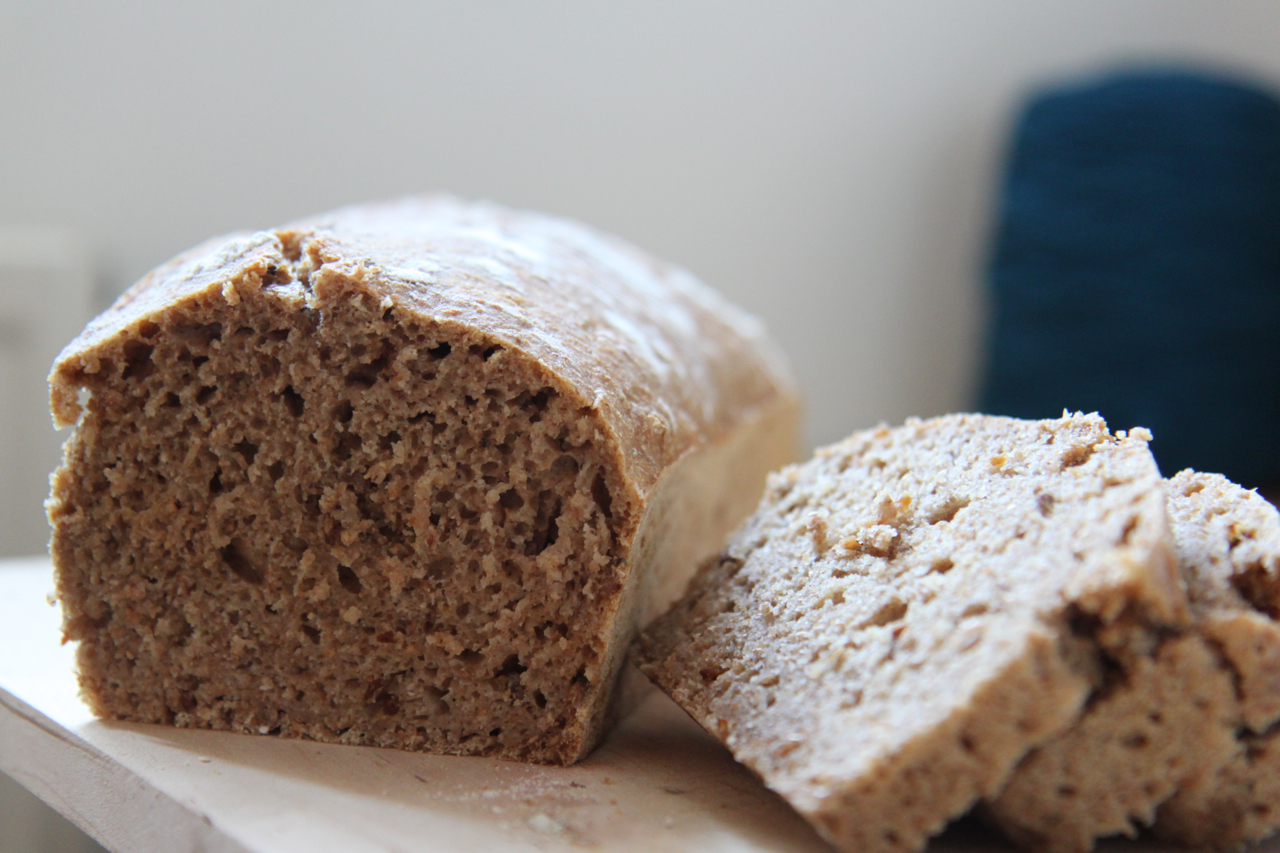
I just wanted to share this recipe for Sourdough bread that has got me on a weekly regime that supplies us with more than our fair share of wholesome bread for the week. It was kindly passed on to me by Lina who was given it by Cecile. Now all you need is a Sourdough starter, make one yourself or ask around. You may be surprised by how many people have a starter or know of one that you could have a spoonful of. I hear our lovely bakery down the road called the E5 Bakehouse in London Fields has a new sourdough starter that is over 100 years old and from Iceland. My Grandpa's father was a sailor from Iceland who jumped ship and ended up in Australia. Since we are emigrating to Australia this year as a family and my Grandpa turns 100 later this year, I secretly harbour hopes of getting me some of this infamous starter and baking bread in Australia for the special centenary celebrations. It was be a nice story wouldn't it? Well anyway, here is the recipe, click on the images to view in full and then print. Follow the directions to the letter and you'll have two lovely big loaves. I freeze one for later in the week unless the first loaf doesn't make it past baking day! But remember, resist cutting into the loaf until it has properly cooled down or you will destroy the crumb! (whatever that means)Thursday, 2 June 2011
Merlin's technicolour dream quilt
I've been meaning to blog about this quilt project for a while now. When I was expecting my first baby (Merlin now aged 2), my Mum had the idea to create a patchwork quilt made up of squares created by all the wonderfully creative women in our family and friends close to us. It was completed for Merlin's 1st birthday Dec 2010.
The result is this magical technicolour dream quilt with a whole lot of history. There are pieces of retro 70s curtains from my baby room, embroidery from the baby bib of Merlin's grandmother, Merlin's father's embroidered school badge from his uniform showing the ashford river where he grew up. There is a crochet granny square by Merlin's great grandma, stunningly detailed embroideries by Merlin's great aunt in France, wonderful silk applique by some friends living in cambodia at the time which depict little scenes with fond memories of our friendship. There is even Merlin's knitted umbilical cord tie made of bamboo yarn that I made to avoid the standard issue plastic one (complete with mummified belly button!). I know, I know... slightly weird but nevertheless all part of Merlin's birth story.
![]() |
| click on image to view detail |
The quilt project had its own facebook group where the most active members, my mother and auntie Corrie uploaded pictures of their squares as they went. There were squares from England, Cambodia, Australia and France. It was so touching to have so many dear friends and family add to the story of the quilt. It gives us as a family many visual cues about those dear to us, especially considering Merlin will always be on the otherside of the world to one half of his extended family. It's a story quilt. When he gets his own bed, this quilt alone will provide enough bedtime stories for an entire childhood.
To those of you who contributed, thank you for the love and creativity you bestowed these small squares of fabric that together will keep Merlin warm and entertained for years to come. It's truly an heirloom and we will treasure it always. Sorry it has taken me so long to actually show you photos of the finished piece!
Mum sewed all the squares together with the seams on the right side. With the squares all being quite different in size many of them would have lost quite a lot of their edges. The effect is that each square is kind of framed by its selvedge.
Contributors and relationship to Merlin
Bev (grandmother)
Pat (grandmother)
Corrie (great aunt)
Marilyn (great aunt)
Faye (great aunt)
Elaine (great grandmother)
Josephine (late great grandmother)
Penny & Ellie (aunt and cousin)
Heidi (aunt)
Brenna (mother)
Dominic (father)
Kirsten (friend)
Andrew (friend)
Daisy (friend)
Nami (friend)
Janet (friend)
Mags (friend)
![]() |
| some individual square that were photographed before the quilt was put together, click to see detail |
Thursday, 26 May 2011
Dyes from plants
We've just returned from a bit of a research holiday around Herefordshire and Wales so it has been a long time since I posted on this blog. I'm slowly trawling through the mountains of blog fodder I gathered on this trip which included visits to many a woollen mill, a knitting design weekend and tours of various eco communities.
To start off I just wanted to post a couple of beautiful pictures of an incredibly inspiring spectrum of naturally dyed wool skeins.
We visited the National Wool Museum in Wales where these lovely little specimens were on show. They were created by the Wallis Woollen Mill, Dyfed, Wales which closed in 2002.
The plaque reads "These colours were extracted from nine different plants with the exception of the bright reds, pinks and burgundies which were obtained from the cochineal beetle. Natural dyes were in use until the middle of the nineteenth century, when synthetic dyes based on coal tar were discovered. Synthetic dyes are cheaper to use and it is easier to repeat colours more exactly but they lack the subtle harmony and gentle ageing properties of natural dyes. Recipes used in this mill in the nineteenth century are still in existence today. "
To start off I just wanted to post a couple of beautiful pictures of an incredibly inspiring spectrum of naturally dyed wool skeins.
The plaque reads "These colours were extracted from nine different plants with the exception of the bright reds, pinks and burgundies which were obtained from the cochineal beetle. Natural dyes were in use until the middle of the nineteenth century, when synthetic dyes based on coal tar were discovered. Synthetic dyes are cheaper to use and it is easier to repeat colours more exactly but they lack the subtle harmony and gentle ageing properties of natural dyes. Recipes used in this mill in the nineteenth century are still in existence today. "
More from this fascinating museum later...
Labels:
natural dyeing,
threads,
wales,
wool
Monday, 2 May 2011
Summer Hats Hand Stitched in American Smocking
Hooray for the sun! It's properly back after what feels like a very long winter. We've had some beautiful sunny weather here in London and I've been loving the chance to wear my summer hat again. I've just put a whole bunch of new hats on my etsy shop please take a look.
I have lovingly hand stitched these vintage style hats using fabrics from my collection, mostly vintage pieces I've picked up from various places. I just love American smocking and how it makes gingham fabric look almost woven by the way it pulls together every other square of the grid.
There is a great tutorial on American Smocking here. It looks complicated but actually you can really get into a rhythm with the stitching, so although it has to be done by hand your stitches seem to fly by. Traditionally you use the grid of the gingham fabric to guide you in your stitching but you can also use non check fabric and just draw on your grid.
I've just had some lovely photographer/fashion designer friends staying who took some fantastic photos of my hats.
Here is a link to the fabulous Finnish photographer who so beautifully photographed my hats being modelled, thank you Arsi and thank you to my good friend Jaana who made a most beautiful model!
Wednesday, 13 April 2011
How to make knitted Easter bunnies
This is a great craft project to do with the kids this Easter holidays. I've seen this in an old Waldorf crafts book, it's really simple and great project for Spring. It involves no knitted shaping, you just start from a square of fabric and the rabbit shape is formed by the simple sewing up and stuffing.Step 1: knit a square in garter stitch or stockinette stitch or for a super fast rabbit cut out a square from an old woollen sweater. A square about 18cm (7") width makes a large bunny as shown, the little one is made from a square approximately 12cm (5").
Step 2: Sew each corner up about one third of the length of the edge...
Step 3: Stuff the cavity with wool, putting a bit more stuffing in the top as this will form the head.
Step 4: Sew up the hole by gathering the top and bottom of the hole and stitching the sides of the hole together...
Step 5: Form the head by tying a length of yarn around tightly at the end you would like the head to be.
Step 6: Sew the limbs in place by sewing the front two legs together and folding the back two legs forward and stitching them to the body to keep them in place.
Step 7: Make some ears, stitch some eyes and a nose and finally attach a small pom pom or ball of yarn to form a tail. The ears can be made from cutting out a piece of felt, knitting some up or using a folded i-cord or other piece of cord or ribbon. Improvise and make your bunny uniquely yours. Happy making!
Other craft activities to do with the kids this easter holidays:
Labels:
craft project,
Easter,
free pattern,
kids,
knitting,
toys,
waldorf,
wool
Tuesday, 12 April 2011
A little bit of a beautiful thing
On the weekend just gone, I had the most wonderful experience at the Battersea Arts Centre annual One-on-One Theatre Festival. This is a theatre festival where each performance is performed for you alone. It was incredibly intimate and at times challenging and at first I felt very nervous indeed but that didn't last long as I came to realise this was entirely the point of the festival.
The festival goers could choose from a number of set show menus. I chose Menu 9 - Reflective.
The piece I want to write about here was a lovely little history lesson from which each participant came away literally with a little slice of the past. It was called "A little bit of something beautiful" and was by Barnaby Stone actor/cabinet maker.
In the room there was a large oak beam, it was a 700 year old piece of oak that was once a beam in the attic of the beautiful Elizabethan Hardwick Hall. After sharing some facts about the beam and contemplating the past as it may have resonated in this piece of wood, the artist began hammering in a wooden nail that I was asked to choose from a pile and sanding and polishing the surface. Then he pulled across a ban saw, that was set up on a track along the floor and cut off a sliver of the beam punched with my initial and presented it to me as my little bit of something so beautiful. Held up to the light you can see evidence of the other wooden nails that have been hammered in representing other participants. The nails are in a range of woods from cherry (the redish wood), walnut (the dark one) and I forget what the light one was, ash or something. It was a truly charming performance and this piece of wood something I will forever cherish.
The festival goers could choose from a number of set show menus. I chose Menu 9 - Reflective.
The piece I want to write about here was a lovely little history lesson from which each participant came away literally with a little slice of the past. It was called "A little bit of something beautiful" and was by Barnaby Stone actor/cabinet maker.
In the room there was a large oak beam, it was a 700 year old piece of oak that was once a beam in the attic of the beautiful Elizabethan Hardwick Hall. After sharing some facts about the beam and contemplating the past as it may have resonated in this piece of wood, the artist began hammering in a wooden nail that I was asked to choose from a pile and sanding and polishing the surface. Then he pulled across a ban saw, that was set up on a track along the floor and cut off a sliver of the beam punched with my initial and presented it to me as my little bit of something so beautiful. Held up to the light you can see evidence of the other wooden nails that have been hammered in representing other participants. The nails are in a range of woods from cherry (the redish wood), walnut (the dark one) and I forget what the light one was, ash or something. It was a truly charming performance and this piece of wood something I will forever cherish.
Friday, 1 April 2011
Natural Dyeing: Organic Cotton Baby Dresses
This was one of my first experiments in the wonders of natural dyeing. Although you could say I cheated somewhat by buying the natural powdered dyes by Earthues, but for my first experiments I wanted to try to get my head around the process of mordanting (preparing the cloth/fibre to take the dye) and then playing with resist and dip dyeing to really understand the possibilities.
I love the idea of really getting experimental with this medium however. I was kindly given a book called A Dyer's Garden and have my heart set on the idea of growing and harvesting my own dyestuffs, especially the most wonderful indigo. I'm just hankering for my own garden, one that I can really invest the time and energy into.
For now however I have Alkanet growing rampantly in my backyard, it's very invasive and common around East London and it makes the most wonderful greys and aubergine colours. I'm currently drying some roots and have some others soaking for use at a later date. I'll post about these real experiments soon, but for now here are some dresses I made from organic cotton knit fabric then dyed with a range of pigments including Madder, Teal, Fustic and Logwood purple and I only used small amounts of the non toxic cellulose fibre mordant alum acetate.


These dresses are made to fit a little girl approx 12 months to about 24 months. They are designed and made by me, in a beautifully soft organic cotton with little bows on the shoulders. Each one has been individually resist dyed in a range of natural earth dyes. You can find out more or pick one up on my Etsy shop.
I love the idea of really getting experimental with this medium however. I was kindly given a book called A Dyer's Garden and have my heart set on the idea of growing and harvesting my own dyestuffs, especially the most wonderful indigo. I'm just hankering for my own garden, one that I can really invest the time and energy into.
For now however I have Alkanet growing rampantly in my backyard, it's very invasive and common around East London and it makes the most wonderful greys and aubergine colours. I'm currently drying some roots and have some others soaking for use at a later date. I'll post about these real experiments soon, but for now here are some dresses I made from organic cotton knit fabric then dyed with a range of pigments including Madder, Teal, Fustic and Logwood purple and I only used small amounts of the non toxic cellulose fibre mordant alum acetate.


These dresses are made to fit a little girl approx 12 months to about 24 months. They are designed and made by me, in a beautifully soft organic cotton with little bows on the shoulders. Each one has been individually resist dyed in a range of natural earth dyes. You can find out more or pick one up on my Etsy shop.
Labels:
babies,
natural dyeing,
sewing
Subscribe to:
Posts (Atom)